How To Clean Your Vornado Air Circulator
Vornado Australia
3 Simple Steps To A Clean Unit.
When it comes to household appliances, it can often be difficult figuring out how to effectively clean them - especially when it involves taking them apart.
Here at Vornado, we’ve put together a guide (and an instructional video) on how to safely - and effortlessly - clean your Vornado Air Circulator unit.
The Vornado in this tutorial is a Vornado 660. If you're looking for more specific information for your Vornado, read the cleaning instructions in your User Manual.
Please Note: The Vornado 660 in this tutorial has 3 screws located at 10, 2 and 6. Vornado 660 Air Circulators manufactured in April 2023 onwards will have 4 screws located at 10, 2, 5 and 7. You can download the older version of the manual from the Vornado 660 product page.
What You’ll Need
Cleaning your Vornado Air Circulator is incredibly easy, and you only need a few household items to get it done:
- long Phillips head screwdriver (3mm to 3.5mm, Size 1 or 2)
- Soft cloth
- Optional: Vacuum cleaner

Step 1
The first step to cleaning your Air Circulator is to remove the front grill.
At the top of the unit (rear side), you’ll find two screws. Using the Phillips head screwdriver, carefully unscrew these and place these screws somewhere safe so as not to lose them.
Once these are removed, tilt the Air Circulator back all the way (the front grill will now be facing upwards towards the ceiling) to find a third screw at the base of the unit, slightly to the left of the tilt mechanism. Remove this third screw and place with the others for safekeeping. Please note: Vornado 660 Air Circulators made in late 2022 onwards will have 4 screws.
Once all three (or four) screws have been removed, you can now easily lift the front grill from the unit. Place this to the side for the time being.

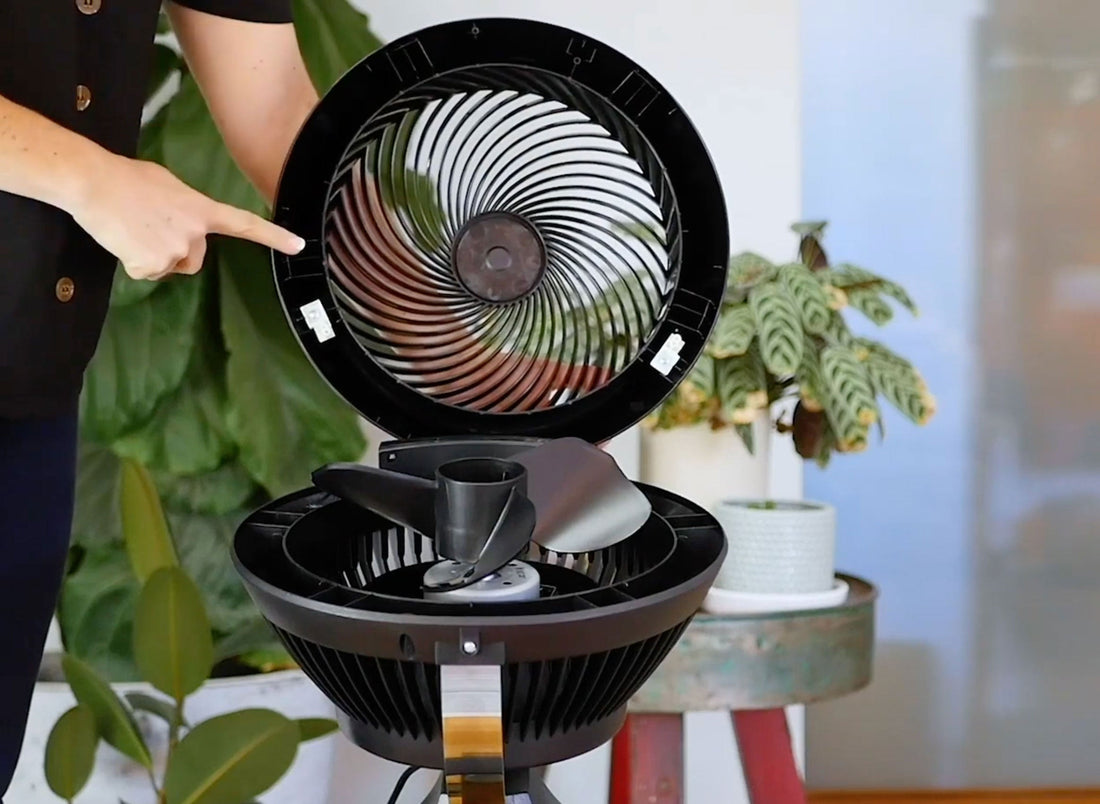
Step 2
Now that the front grill has been removed, you will easily be able to access the blades inside the Air Circulator.
Using the soft cloth, carefully wipe down each blade to remove any dust that may have built up after a period of inactivity, as well as the inner parts of the unit. A dry cloth is all you need, but it can be dampened before use if preferred.
Next, use the same cloth to wipe down the inside and outside of the front grill, allowing you to remove any dust and unwanted fingerprints.

Tip!
You can even use your household vacuum cleaner to remove any hard to reach dust, especially for the internal parts of the unit behind the blades. A vacuum cleaner hose or narrow attachment will allow you to easily reach and clean these areas, and can also be used on the blades and front grill for ease of use.

Step 3
Now that the unit has been cleaned, it’s time to reattach the front grill.
To do this, line up the brackets and holes for each screw on both the inside of the unit, and the inside of the front grill. Lower the grill into place until the clips attach. The “V” of the Vornado logo should be “pointing” towards the bottom of the unit, or the hinge mechanism.
Replace the screw at the bottom of the unit, then tilt the unit back to its upright position. Replace the final 2 screws at the top rear, and then use the cloth to give the unit one final wipe down to remove any final fingerprint.
All done!
That’s it! Your Vornado Air Circulator now looks good as new, and you can continue to use your unit throughout your home without the worry of unwanted dust.
Enjoy year round comfort with Vornado.
Still need help?
Is the Vornado pictured not the same as the Vornado you have at home? Don't worry! Use the video above as a guide and follow the cleaning instructions found in your User Manual.
No longer have your User Manual? That's okay, to download a new user manual, click here.
If you've watched the video, and read the user manual, and you're still having trouble, give us a call and we can help walk you through the steps. To find our contact information, click here.
4 comments
Hi Robyn, you will need a size 1 or 2 Phillips Screwdriver for most Vornado models. The end of the screwdriver should be about 3-3.5mm, depending on the size of the Vornado. The ideal blade length would be 10cm, but you could go shorter if you had a smaller unit. If you get stuck, give our team a call on 1800 099 012 and we can guide you through the steps.
Could you please advise what size and/or brand of screwdriver fits the screws in the Vornado 560-AU? The screws are set so far in that all of my screwdrivers are either too short, or too fat to fit into the tube leading to the screw. I love the fan, and it works very well, but I can’t get in to clean it!
Hi Gerard, thank you for your comment. The model in this article is the Vornado 660. For cleaning instructions on your models, the user manual outlines the correct locations of the screws and the best way to take off the grill. If you no longer have your user manual for the 683, you can download it from our website via the product page or on the User Manual page (link in the footer). We don’t range the 630 in Australia, so you’ll need to go to the USA website to download the user manual. Hope this helps! Give us a call if you get stuck and we can walk you through the steps.
I got 630 and 683 model!